Plenty Sweet Life

Grandma's Recipes One By One!

Nachos Dip

Today’s recipe for Nachos Dip came out of necessity. My husband recently told me that he hates Nachos. He hates how they stick together and the tasty ingredients don’t stay on the chips. I mean, this guy LOVES a good dip – he makes a dip out of EVERYTHING. He uses chips to seriously make a dip out of almost everything he eats (it would be everything, if he could). What do I do? Figure out a way to enjoy Nachos but make them easier to eat – I needed to figure out a Nachos Dip! It turned out to be a delicious combination of Nachos and Seven Layer Dip. I think it turned out pretty well –  he enjoyed it and dipped away to his heart’s content. Perfect – problem solved. I hope you like it, too!

Here is the recipe as I made it:

Nachos Dip

For the taco meat, brown:

1 pound ground beef or turkey (I used turkey here)

Add:

1 envelope taco seasoning (I used 3 Tablespoons of homemade taco seasoning)

1-8 ounce can of tomato sauce

Cook until thickened (at this point you could refrigerate or even freeze the meat until you’re ready to use it, and then just reheat it when making the dip).

Layer in a large dish or casserole:

Taco meat

Black beans

Tomatoes and/or salsa

Black olives, sliced

Cheddar cheese, shredded

Green onions, sliced

Sour cream

On the side (some people don’t like these and can put on as much or as little as they like) – cilantro, sliced fresh or pickled jalapenos, hot sauce, lime wedges.

Add on anything YOU like on nachos.

Serve with your favorite tortilla chips!

DSCN6562

The ingredients are pretty – and pretty healthy when it comes right down to it. I try to find low fat chips, too.

DSCN6567

These are the things we let each person put on themselves: we have one family member who doesn’t like cilantro and one family member who thinks ketchup is spicy. No cilantro or peppers or hot sauce for those two, but then we have a couple who really like to pour on the spice – those crazy guys can load up if they want to.
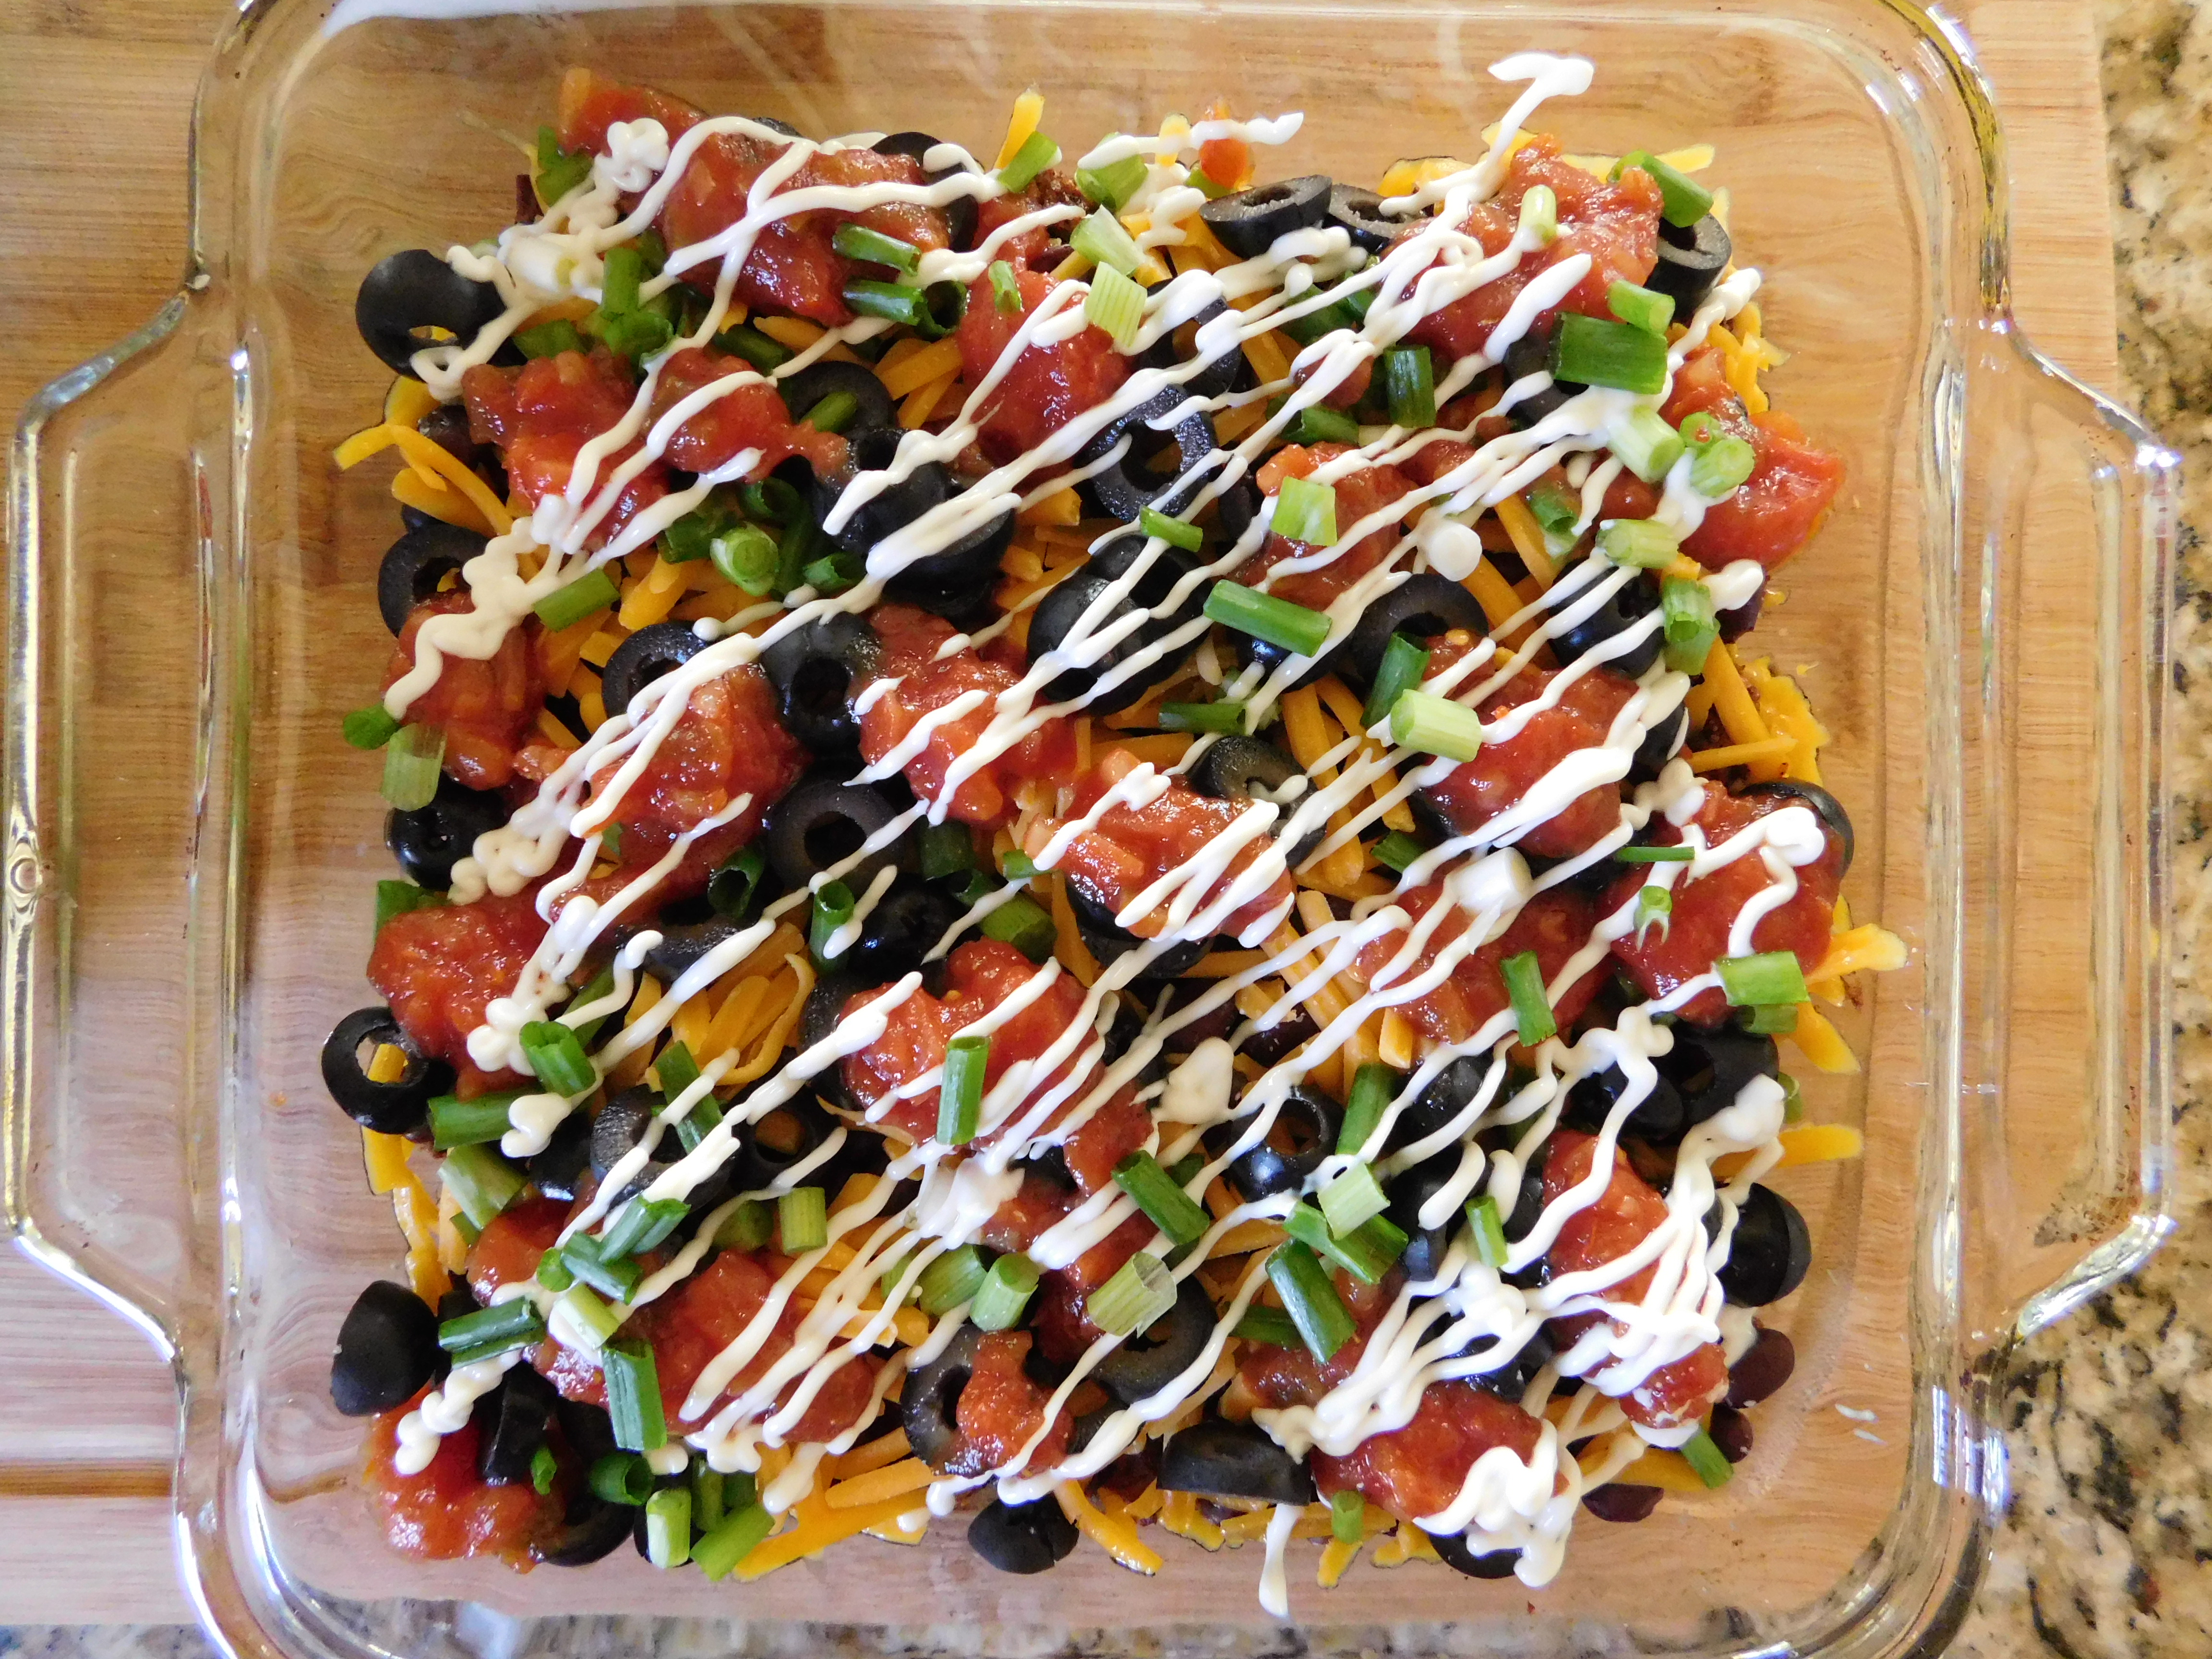
DSCN6583

When putting on the sour cream, I thinned it out with a bit of milk, put it in a squirt bottle, and drizzled over the top! So pretty!

DSCN6580

A little squirt of lime on top and I think we’re ready to go – here’s the moment of truth – will he like the dip?!!

DSCN6592

He liked it! Yay! This worked really well, and we might be having our Nachos like this all the time! It was so much easier to dip all the delicious goodness onto a chip instead of balancing the goodies on said chip. Plus – they were absolutely delicious! All the tasty ingredients and none of the mess! We loved it! If you’re having extra company this weekend, or need a great snack for the big game coming up, or maybe you have someone special who just likes a good dip, you might want to try and make a big batch of this Nacho Dip – and don’t forget to serve a LOT of chips!


2 Comments »

Ham and Tater Tot Egg Bake

When you buy a 16.5 pound ham for 3 people to enjoy for Christmas Eve dinner, you end up needing to find recipes like Ham and Tater Tot Egg Bake to use it up. We had enough for at least 6-8 other meals when all was said and done, so I decided to make up a new recipe that uses ham for an egg bake. I used the recipe for Company Breakfast Bake as a guide when I was making this one up, because it is also delicious. Some year, I’ll have to post the recipe I use for making our annual gigantic Christmas Eve ham. It’s full of Christmas spices and it makes the most delicious gravy, but that’s why we make such a big ham every year – we don’t mind having LOTS of leftovers.

Here is the recipe as I made it:

Ham and Tater Tot Egg Bake

Layer in bottom of a greased 9″ x 13″ pan:

2/3 of a 32 ounce package of tater tots, with the rest reserved for topping the egg bake later

1 cup shredded cheddar cheese (or substitute any kid of cheese)

1/4 cup red pepper, chopped

1/4 cup green pepper, chopped

2 – 4 Tablespoons red onion, chopped

2 cups cubed ham (or sausage or bacon or chicken or turkey)

Mix together:

8 eggs

3/4 cup milk

1/2 teaspoon salt

1/2 teaspoon pepper

Pour over top over all.

Top with the last 1/3 of the tater tots.

Cover and refrigerate overnight (I baked it right away, but the original recipe says it can sit overnight).

Bake at 350 degrees about 30-45 minutes (Because I baked it right away and the tots were still frozen, it took a lot longer to bake than 30 minutes – closer to an hour – I let it bake until a knife came out clean from the middle of the egg bake).

Let stand 10 minutes.

I layered the tots on the bottom of the pan.

Next, sprinkle on the shredded cheddar.

Then on go the chopped peppers and onions.

Cubed ham is next.

Mix up the egg mixture . . .

. . . then it goes over the top of the layers.

The last layer is the rest of the tater tots.

This is it – out of the oven and beautiful.

What a great use of leftover Christmas ham!

This ham and egg bake was absolutely delicious! I’m so glad I happened to have a bag of tater tots in the freezer. It used up some of our leftover ham, and we had a delicious brunch to boot! The last topping of tots was nice and brown and the addition of the peppers and onions was really good! This will be on our egg bake rotation for sure – it was really good. I think this would be good to make on a Sunday so you have your breakfast ready for the week. Make this Ham and Tater Tot Egg Bake for your brunch this weekend – I know you’ll like it!


4 Comments »

String Bean Royal

String Bean Royal (with no “e”?) is similar to the classic casserole we all make this time of year using green beans and the obligatory cream of mushroom soup and French fried onions. I have made one kind of Green Bean Casserole (not the classic) but this one has the added flavor of onion and cheddar cheese. While I LOVE the crunch of the French fried onions that we all put on top of the classic, this one used regular sliced onion on it, with the deliciousness of shredded cheddar over the top of it all. I mean, how bad can that be? Not bad. It’s so good! And the best part of all with this recipe – it’s another ridiculously easy one! Yes! We like that! Easy, easy, easy! Did I mention that this one is easy? I think I did. It’s so great!

Here is the recipe as I made it:

String Bean Royal

Drain:

1 or 2 cans of string beans (or green beans – I used 2 cans)

Pour into a greased baking dish.

Mix together and toss with the beans:

1 can cream of mushroom soup

1/2 cup rich milk (they probably mean whole milk here, but I used 2% milk)

Slice thinly and layer on top of beans:

onion (I used 1/2 of a small onion)

Top with:

grated cheddar cheese (I used about half of an 8 oz. package of shredded cheddar)

It didn’t say what temperature to bake at, so I baked it at 350 degrees for 45 minutes.

Once you have the green beans, milk, and cream of mushroom soup combined, on goes the layer of sliced onions.

Next is the layer of shredded cheddar cheese. I used about half of an 8 ounce package, but next time I’d just use the whole thing. Can you really ever have TOO MUCH cheese?

Out of the oven and it’s bubbly and hot and the cheese has melted – oh my! See – I think more cheese might cover ALL of the creamy goodness – so use the whole 8 ounce package of shredded cheddar.

This might be a new classic for your thanksgiving dinner!

It. Is. So. Good.

This is the easiest and most delicious side dish you’ll ever put in your mouth! Making a Thanksgiving dinner is a lot of work. Why not go easy on a few of those classic dishes that everyone loves and can’t do without? Your guests, friends, and family are going to LOVE this String Bean Royal – and you will, too!


Leave a comment »

Cheese-and-Herb Scones

This is a recipe for Cheese-and-Herb Scones off of some ripped out magazine pages I’ve had for years, from which I’ve made several recipes: Chocolate Chip Scones, Maple Pecan Scones, and Sesame-Orange Scones. My goal is to make all of these recipes at some point, so I’m on recipe #4 and counting. I love scones, don’t you? Seriously – there’s nothing better than warm scones, fresh out of the oven, slathered in melty butter, and jam. Oh my goodness. Maybe I should go work on recipe #5 right now! Ha! Ok, ok, I’ll leave that for another day. Let’s get on with this recipe. This one’s a little bit different from your regular type of scone. It’s a savory one – not one that you’d slather with butter and jam. Well, I’d still slather it with butter, but I think it’s more the type you’d serve with Grandma’s Tomato Soup and salad instead of a breakfast or tea time treat. These scones are a lot like the Cheese Muffins recipe that my mother-in-law gave me – you should try that recipe, too!

Here is the recipe as I made it:

Cheese-and-Herb Scones

In a large bowl combine:

4 cups flour

4 teaspoons baking powder

1 teaspoon salt

1/2 teaspoon dried basil

1/4 teaspoon dried thyme

1/4 teaspoon ground red pepper

Cut in until mixture resembles coarse crumbs:

2/3 cup vegetable shortening (I used butter)

Stir in:

3/4 cup shredded Cheddar cheese

Add:

1 1/3 cup milk

1 Tablespoon Dijon mustard

Mix lightly with fork until mixture clings together and forms a soft dough.

Turn dough out onto lightly floured surface and knead gently 5 or 6 times.

Divide dough in half.

With lightly floured rolling pin, roll one half of dough into a 7 inch round.

Cut into 4 wedges.

Repeat with remaining half of dough.

Place scones, 1 inch apart, on greased baking sheet.

Pierce tops with tines of fork.

Brush tops with water and sprinkle with remaining 1/4 cup cheese.

Bake at 425 degrees for 15-18 minutes, or until golden brown.

The savory part of these scones – the herbs added instead of sugar!

This is what it looks like when the butter is cut in – it does look like coarse crumbs.

I mixed the milk and the mustard together before adding them to the mixture.

Mix it together to make a soft dough and onto the floured surface, ready to knead.

After kneading, the next step is to divide the dough in half and roll it into a 7 inch round.

I cut the scones into 6 pieces instead of 4, just because 4 seemed like they’d be a bit large. Do this with the other half of the dough, too.

Onto the baking sheet, prick the tops with a fork, brush with water, and sprinkle on the remaining shredded cheese. I’m sure I used more than 1/4 of a cup for the topping. How bad can it be to add even more shredded cheese?

O.M.G. These smelled SOOOOO good baking!

These savory scones would be nice as an egg sandwich for breakfast, or they’d be great with Grandma’s Tomato Soup and a salad for lunch, or they’d be awesome plain slathered with the obligatory melty butter. The cheese and herbs make them absolutely melt-in-your-mouth delicious, and I’m not even kidding. You’d better make a batch of these today, because you and your family are gonna LOVE these Cheese-and-Herb Scones!


4 Comments »

Country Pie

I found this recipe for Country Pie in one of Grandma’s old cookbooks – it was submitted by one of Grandma’s sisters, who originally got it from her daughter – who just happens to be my mom’s cousin and my godmother. This cousin is the one who grew up so close – close in age, close in proximity, and close in relationship. They always say they were more like sisters than cousins, even though my mom is a year older. This is a photo of the two of them dressed alike. I love how their parents always used a nice backdrop for their photos! Ha! They have the same dresses, and hair bows, and even their hair is styled the same!

They were great friends – still are! They were just so stinkin’ cute – still are!

As for the recipe – it was submitted to the church cookbook, but I also found the handwritten copy of the same recipe from Grandma’s sister. I love those old recipes, so I put the recipe card in here instead of the recipe from the cookbook. This was a great dish I made when our daughter was over for lunch on a Sunday before a Minnesota Vikings game, but it would be an nice week-night meal, too – easy to do and delicious!

Here is the recipe as I made it:

Country Pie

For the crust:

1 pound lean ground beef – not cooked or browned – yes, raw

1/2 cup tomato sauce

1/2 cup bread crumbs (I used panko crumbs)

1/4 cup onion, chopped

1/8 teaspoon dried oregano (I went crazy and added 1/4 teaspoon – I could have used more than that)

1/2 teaspoon salt

1/2 of a small green pepper, chopped

For the filling:

1 1/2 cup Minute Rice

1 cup water

1 1/2 cup tomato sauce (I used a 15 oz can of tomato sauce total – close enough)

1 cup grated cheese (I used cheddar)

1/2 teaspoon salt

Mix all together (except 1/4 cup cheese for top).

Cover and bake at 350 degrees for 25-30 minutes.

Uncover, top with remaining cheese, and bake another 15 minutes (after uncovering, I baked it an additional 20 minutes – to make sure beef was fully cooked – before putting cheese on top).

I know it sounds a little strange to use uncooked ground beef, and I thought so, too, but it works! This is the crust, so I just patted it into the pie pan as if it was a pie crust. It’s more like a meatloaf crust layer.

Next, I poured in the filling – and yes! It all goes in!

I forgot to show that I covered the pie with foil. Luckily – and I DO mean luckily – I had just cleaned my oven!

After the baking it covered, I didn’t feel comfortable with how the beef still looked a bit pink, so I left it in for another 20 minutes or so.

Then, on went the shredded cheese and back into the oven it goes! I may have used more than 1/4 cup of cheese on the top – I like it cheesy.

It came out all bubbly and cheesy and delicious! My daughter and I were brainstorming about this recipe – you’ll probably see more variations of this one down the road!

That meatloaf type crust and the rice filled filling – yum! I would let this sit for 10-15 minutes before serving next time. There was a bit of liquid that wasn’t absorbed into the pie when I cut it for the first slice, but when we went back for seconds, it had.

This was an amazingly delicious lunch, but I just can’t help think it would be a great weeknight dinner – it’s pretty fast to pull together! I served it with a bit of sour cream and some chives from my garden, but ketsup and green onions would be good, too. I think this may just become a staple in this household – I hope you’ll try this Country Pie and make it a staple in your household, too!


3 Comments »

Farmhouse BBQ Muffins

This recipe for Farmhouse BBQ Muffins came from my mom. I don’t know where she got it, and I don’t think she ever made them for us, but I’m glad I found the recipe. These muffins are totally something I would have made for my kids, if I had the recipe when they were little. My kids would have (and probably still will) eat these up! I know that the kids in this photo would also have eaten these up, and I know that their mothers (Grandma and one of her sisters) would also have eaten them up – for how easy they are to make. This is one of Grandma’s sisters with her daughter (my godmother) and my mom (in the middle) and her brother (my godfather). You can see a picnic table in the background, and while they look like the photographer took them a bit by surprise here, by the size of the fish they’re holding, I think they were having a great time!

They must have been enjoying a lovely day at a park. I just love this pic – it looks like a typical summer day. So cute.

Ok – back to today’s recipe. Your kids and grandkids will eat these up. I promise. They’re great for a quick weeknight dinner, to put into your husband’s work lunch, or for a beautiful summer day when you’re in a hurry to get back outside and catch more fish. The added bonus is – they’re absolutely delicious.

Here is the recipe as I made it:

Farmhouse BBQ Muffins

Separate:

1 tube (10 ounce) refrigerator buttermilk biscuits

Flatten into 5 inch circles.

Press each biscuit into bottom and up sides of greased muffin cups (I got 12 muffins from one tube of Grands biscuits); set aside.

Brown:

1 pound lean ground beef

Drain.

Mix together:

1/2 cup ketchup

3 Tablespoons brown sugar

1 Tablespoon vinegar (I used apple cider vinegar)

1/2 teaspoon chili powder (my family likes things a bit spicier, so I added 1 teaspoon plus 1/2 teaspoon of red pepper flakes)

Add to meat and mix well.

Divide the meat mixture among the biscuit lined muffin cups, using about 1/4 cup for each.

Sprinkle with:

1 cup (4 ounce) shredded cheddar cheese

Bake at 350 degrees for 18-20 minutes.

Cool 5 minutes before removing from muffin cups and serving.

You can make the sauce the way the recipe says, or you can spice it up a bit like I did – whatever you like.

I just used my rolling-pin to roll the circles out to 5 inches wide. Spray the muffin tin well before tucking in the biscuits.

I just used all 12 of the biscuits in the tube and then filled them all using up all the meat mixture.

Top them with the shredded cheddar and into the oven!

They’re so cute! They’re puffed and golden and smell delicious!

These are really good. Really good. I know I put a fork in the photo here – just for effect. They seem like you’re meant to pick them up with your hand and eat them like a muffin. My original intention was to make these to put in the freezer for my husband to take to work for lunch, but I may have tried to taste a couple for lunch. I mean as long as they were sitting right there. Most of them did get put into freezer zip-top bags. Most of them. But seriously, folks, these Farmhouse BB Muffins are delicious and your kids and grandkids (and husbands) are gonna love them!

1 Comment »

The New Vintage Kitchen

A Vermont innkeeper's collection of seasonal vintage recipes, reimagined for today's cooks.

Convivial Supper

Recipes from the Past

Cooking Without Limits

Food Photography & Recipes

Mrs. Twinkle

My Wonderful Little World

EASYBAKED

a collection of recipes